2024-01-30

Cách kích hoạt Windows 10/11 vĩnh viễn 2024

1/30/2024 11:17:00 PM Posted by Hoàng Dũng No comments


Cách #1. Cách kích hoạt Windows 10 và Windows 11

NOTE:
Công cụ này chỉ hỗ trợ kích hoạt hệ điều hành Windows 10 trở lên thôi nha các bạn, các phiên bản hệ điều hành cũ hơn không hoạt động đâu.

Bước 1. Bạn nhấn Win + S để mở Windows Search => tìm kiếm với từ khóa powershell => chọn Windows PowerShell => sau đó chọn Run as Administrator để chạy với quyền Admin.

cach-kich-hoat-windows-10-11 (1)

Bước 2. Bạn dán dòng lệnh bên dưới vào => sau đó nhấn Enter.

irm https://massgrave.dev/get | iex

cach-kich-hoat-windows-10-11 (1)

Bước 3. Trong cửa sổ Microsoft Activation Script bạn nhấn số 1 => nhấn Enter để thực hiện.

cach-kich-hoat-windows-10-11 (2)

NOTE:
Bạn có thể sử dụng công cụ này để kích hoạt OFFICE 365 và các phiên bản OFFICE khác bằng cách nhập số 3, tiếp theo nhập số 2 => rồi đợi kết quả 🙂

Bước 4. Đợi và chờ thôi, mọi thứ sẽ tự động hết nha các bạn.

Hình ảnh bên dưới là kích hoạt bản quyền Windows 10 thành công !

cach-kich-hoat-windows-10-11 (2)

Hình ảnh bên dưới là kích hoạt bản quyền Windows 11 thành công !

@sourse: blogchiasekiemthuc.com

2023-01-23

Cài Windsribe OpenVPN trên Router sử dụng OpenWRT

1/23/2023 12:13:00 AM Posted by Hoàng Dũng
Hướng dẫn cài OpenVPN file lấy từ Windscribe lên Xiaomi Router 4A (R4AC) phiên bản QUỐC TẾ (international version) sử dụng OpenWRT Snapshot 22.03.3

Cài các gói cần thiết

  1. Đăng nhập SSH vào router (ssh root@router-ip)
  2. Update: opkg update
  3. Cài gói: opkg install luci
  4. Cài tiếp các gói: opkg install luci-app-openvpn openvpn-openssl

Lấy cầu hình OpenVPN (ovpn file) từ Windscribe, lưu vào Router

  1. Truy cập https://windscribe.com/getconfig/openvpn, chọn Server, UDP, 443, 2.4.6 or newer (tùy vào firmware Openwrt)
  2. Download file config (.ovpn) về máy.
  3. Lưu ý và lưu lại phần Username và Password. Cái này dùng chung cho tất cả các file .ovpn theo tài khoản WS.
  4. Đăng nhập vào Openwrt GUI, vào phần Services > OpenVPN
  5. Điền tên VPN bạn muốn vào phần OVPN configuration file upload (eg: WS_Hanoi), chọn Choose File để upload file .ovpn, nhấn Upload
  6. Bạn sẽ thấy WS_Hanoi trong phần OpenVPN instances sau khi upload, check vào Enabled để nó tự chạy khi Router khởi động lại.


  7. Sau đó, click vào EDIT để chỉnh sửa và thêm Username, Password cho cấu hình WS_Hanoi.
  8. Trong Box đầu tiên, phần auth-user-pass, chỉnh sửa nó file hướng dẫn phần cuối box (thêm đường dẫn đến file .auth, auth-user-pass /etc/openvpn/Ten-File.auth).
  9. Vẫn trong Box đầu tiên, thêm code bên dưới vào dưới dòng resolv-retry infinite
    script-security 2
    up "/etc/openvpn/updns"
    down "/etc/openvpn/downdns"


  10. Nhập Username và Password lúc get file .ovpn từ Windscribe vào Box thứ hai bên dưới, nhấn SAVE sau khi hoàn thành.


  11. SSH vào Router, thêm code bên dưới để tạo file up/down DNS script để chúng có thể thực thi
    cat<<'EOF' > /etc/openvpn/updns
    #!/bin/sh
    mv /tmp/resolv.conf.auto /tmp/resolv.conf.auto.hold
    echo $foreign_option_1 | sed -e 's/dhcp-option DOMAIN/domain/g' -e 's/dhcp-option DNS/nameserver/g' >/tmp/resolv.conf.auto
    echo $foreign_option_2 | sed -e 's/dhcp-option DOMAIN/domain/g' -e 's/dhcp-option DNS/nameserver/g' >> /tmp/resolv.conf.auto
    echo $foreign_option_3 | sed -e 's/dhcp-option DOMAIN/domain/g' -e 's/dhcp-option DNS/nameserver/g' >> /tmp/resolv.conf.auto
    EOF


    cat<<'EOF' > /etc/openvpn/downdns
    #!/bin/sh
    mv /tmp/resolv.conf.auto.hold /tmp/resolv.conf.auto
    EOF

    chmod 755 /etc/openvpn/updns
    chmod 755 /etc/openvpn/downdns
  12. Sửa file /etc/config/dhcp, và thêm đoạn bên dưới vào phía sau config dhcp 'lan' để sử dụng DNS của Windscribe.
    list dhcp_option '6,10.255.255.1,208.67.222.222,208.67.220.220'
  13. Khởi động lại Router, sau đó truy cập lại Services > OpenVPN để xác mình WS_Hanoi đã chạy


  14. Xong!!!!

Bật Network Killswitch (Optional, Recommended)


Lưu ý lựa chọn đúng phiên bản Openwrt, trong trường hợp Xiaomi Router 4A(R4AC) flash bằng Snapshot firmware (tại đây) sẽ sử dụng phần 6.1-b With Openwrt 19.07 and later để bật Killswitch.

Bật Firewall

Nếu không thích sử dụng KillSwitch, hãy bật Firewall để Router để gán VPN cho vùng WAN, sau đó các thiết bị sử dụng LAN có thể truy cập được internet. 
Làm theo hướng dẫn tại: https://openwrt.org/docs/guide-user/services/vpn/openvpn/client-luci#firewall, lưu ý Xiaomi Router 4A(R4AC) sử dụng phần 4.1-b With Openwrt 19.07 (alternative to the above step 4.1).


2023-01-05

Fix NTFS Partition Mounted As Read-Only On Linux When Dual Booting

1/05/2023 11:10:00 PM Posted by Hoàng Dũng No comments

 If it happens in case of dual booting with Windows, you need to uncheck turn on fast startup in Control Panel --> Power Options --> Choose what the power buttons do and then Shutdown, not reboot. 


Once it's done properly you'll be able to access the NTFS partitions normally with read/write permissions.

This happens due to the Windows 11/10/7 update resets it to the default fast startup which is a form of hibernation.

2022-12-12

Increasing Mouse Scroll Speed in Linux (Ubuntu/Mint...)

12/12/2022 02:49:00 PM Posted by Hoàng Dũng , No comments

This article explains how to change the mouse scroll speed in Linux, including Ubuntu, Linux Mint, etc.

Install imwheel and zenity

apt install imwheel zenity


Make a ~./local/bin directory

mkdir ~/.local/bin


Download zenity GUI for imwheel

wget http://www.nicknorton.net/mousewheel.sh -O ~/.local/bin/mousewheel.sh


Make that download executable

chmod u+x ~/.local/bin/mousewheel.sh


Add a desktop launcher

echo -e "[Desktop Entry]\nName=Mouse Wheel Adjustment\nExec=mousewheel.sh\nComment=\nTerminal=false\nIcon=mouse\nType=Application" > $(xdg-user-dir DESKTOP)/mousewheel.desktop


Make launcher executable

chmod u+x $(xdg-user-dir DESKTOP)/mousewheel.desktop


Add an autostart entry for imwheel

echo -e "[Desktop Entry]\nName=imwheel\nExec=imwheel\nX-GNOME-Autostart-enabled=true\nNoDisplay=false\nHidden=false\nComment=\nX-GNOME-Autostart-Delay=15\nType=Application" > ~/.config/autostart/imwheel.desktop


Log off and log back in - click the new Mouse Wheel Adjustment Launcher on your desktop.

2022-11-16

Timeshift Backup Restore Ubuntu/Linux Mint Systems from USB/SSD Disk

11/16/2022 10:42:00 PM Posted by Hoàng Dũng , No comments

 Timeshift is a new app on Linux Mint 19 Tara. Timeshift is used to save a snapshot of the different states of your Linux Mint 19 operating system. When you try out new things on your computer, do upgrades and such stuff, your operating system may break. With the help of Timeshift, gladly, you can go back in time and restore your computer to a point at which it worked perfectly.

In this article, I will show you how to backup and restore Linux Mint 19 systems using USB Storage device with Timeshift. Let’s get started.

BTRFS for Timeshift on Linux Mint 19:

Timeshift works best on BTRFS filesystem. BTRFS has good support for Copy on Write (CoW) snapshots. BTRFS creates snapshots very fast and without any need additional disk space. That’s why I recommend you install Linux Mint 19 on BTRFS filesystem if you want to use Timeshift without hassle.

Timeshift on other Filesystems:

Let’s say, you had no idea about Timeshift or you didn’t know that Timeshift works best on BTRFS filesystem while installing Linux Mint 19. So you ended up installing Linux Mint 19 on filesystems such as EXT4. Now you know about Timeshift and you regret doing so.

Don’t worry about it if that’s the case. Timeshift also supports RSYNC. RSYNC works just as well.

The advantages of creating backups or snapshots with Timeshift using RSYNC is that it doesn’t depend on specific filesystem. RSYNC backups or snapshots can be stored on an external USB Hard Drive as well as a USB Thumb Drive. So when anything goes wrong, you just have to insert your USB storage device and restore your operating system from there. This is all this article is about.

Taking Snapshots and Storing it on USB Storage Device using Timeshift:

For taking Timeshift snapshots or backups, I recommend you use USB 3.0 32 GB USB thumb drive. Use the USB thumb drive for only taking Timeshift backups. That way you won’t accidentally remove any system file from the USB thumb drive. This is very important.

By the way, you can also use USB 3.0 external hard drive or SSD if you want. The procedures are the same.

Before I set up Timeshift, I am going to show you how to get your USB thumb drive ready for Timeshift.

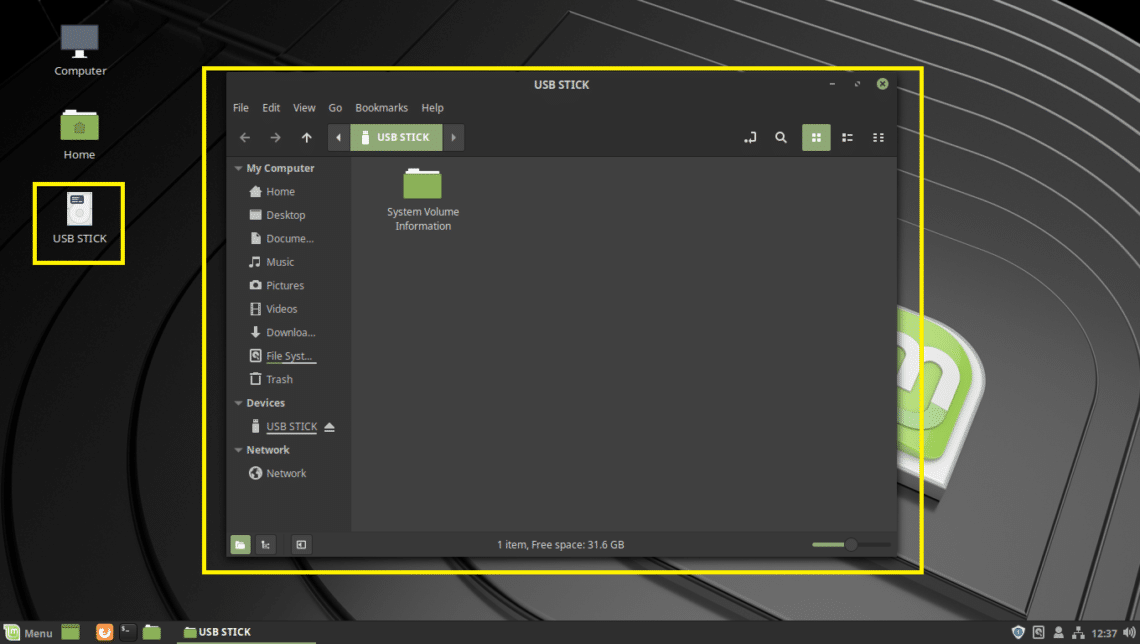
First insert your USB Storage device and Linux Mint should detect it.

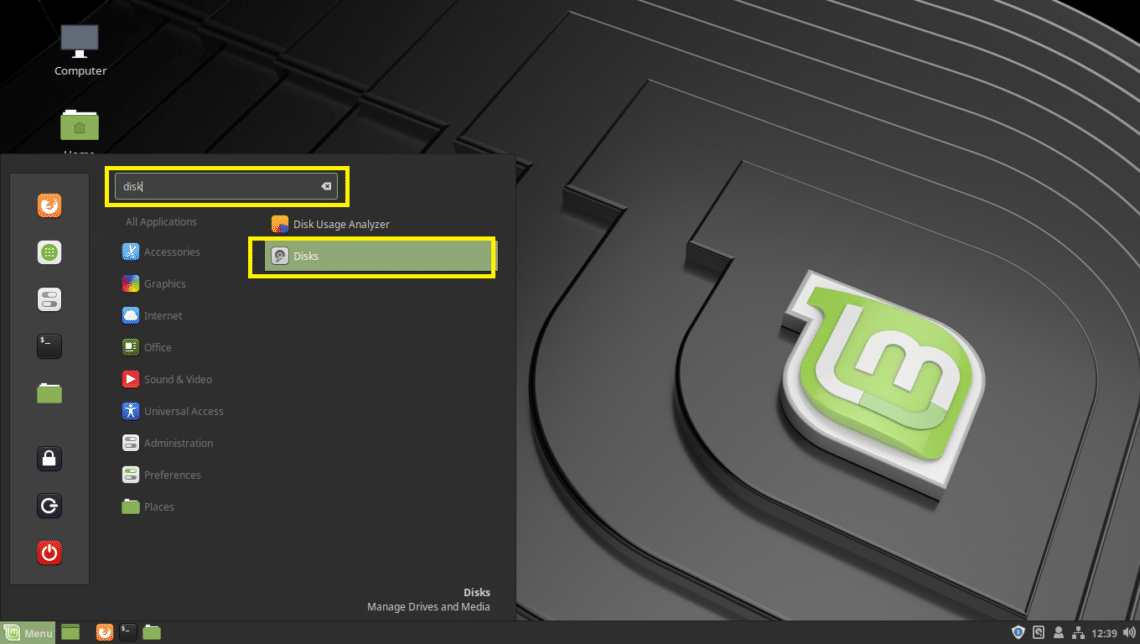
Now open the Disks app from the Mint Menu.

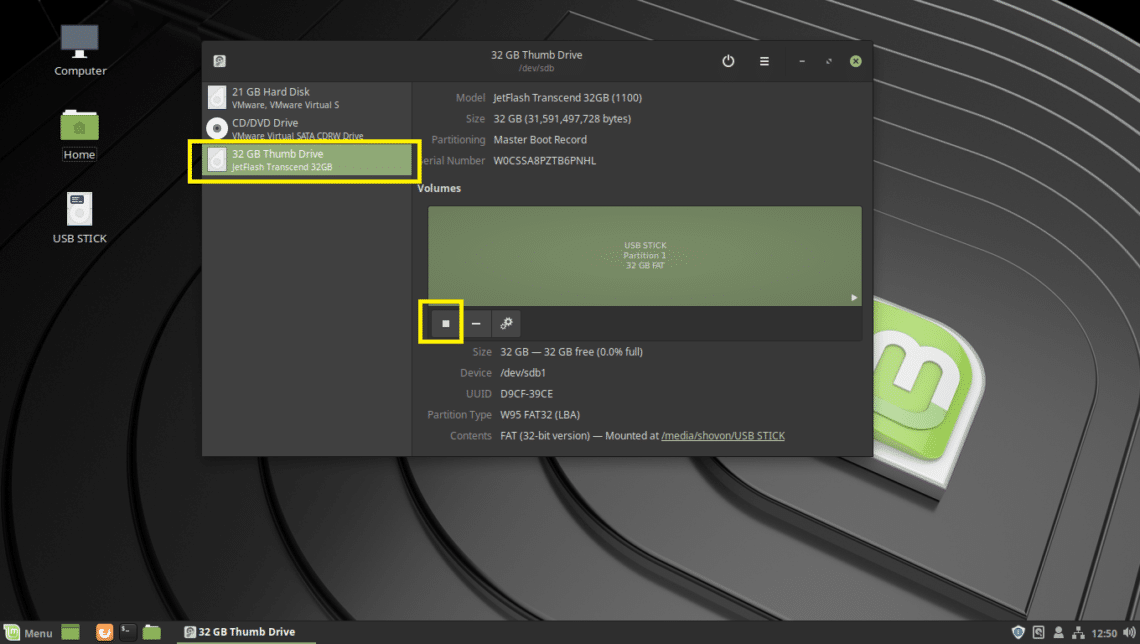
Then select your USB Storage device from the Disks app and click on the stop button as marked in the screenshot below.

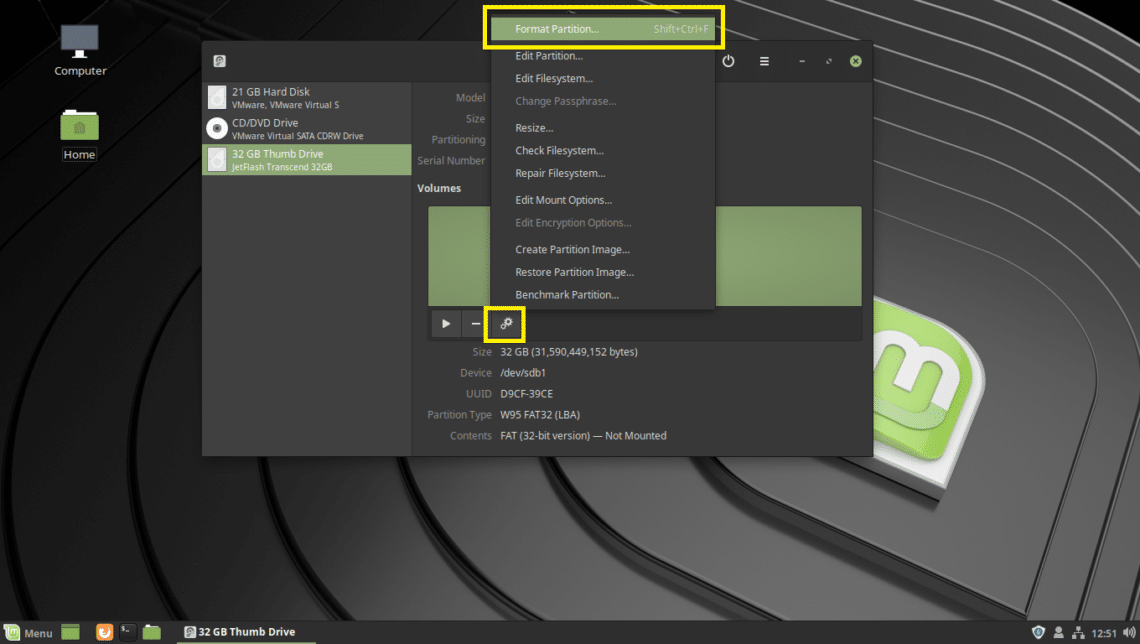
The USB Storage device should be unmounted. Now click on the Settings icon and then click on Format Partition… as marked in the screenshot below. You can also press Shift + <Ctrl> + f

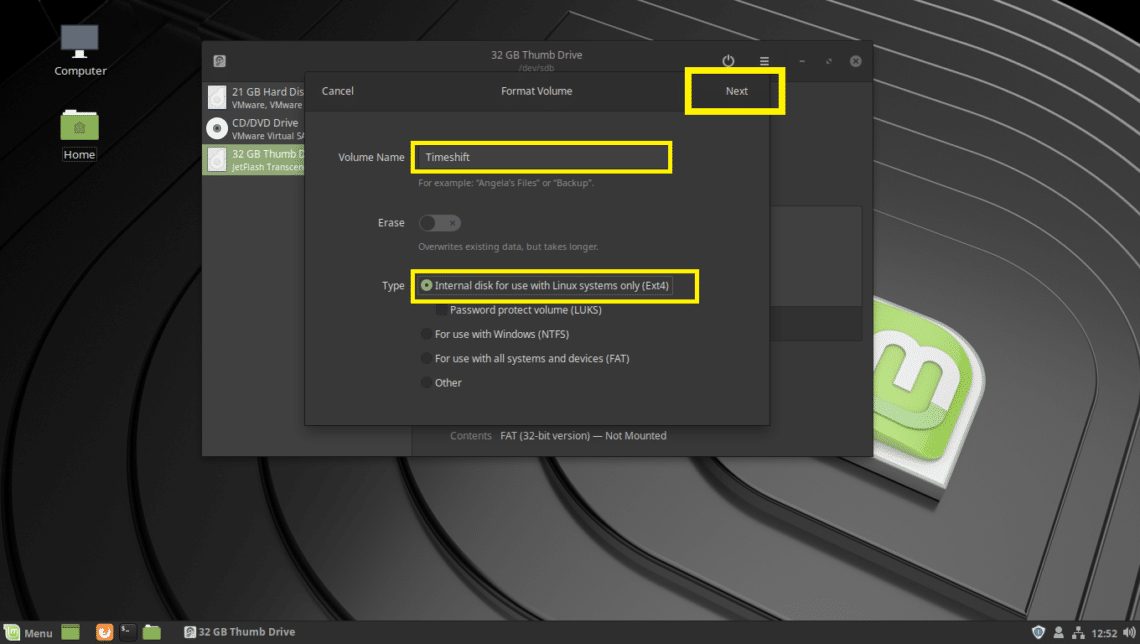
You should be the Format Volume window. Type in Timeshift on the Volume Name field, and set type to Ext4 as marked in the screenshot below. Once you’re done click on Next.

Note: I used Ext4 filesystem format because I don’t want it to be detected by Windows operating systems and corrupt my files in case it has viruses. Just playing on the safe side.

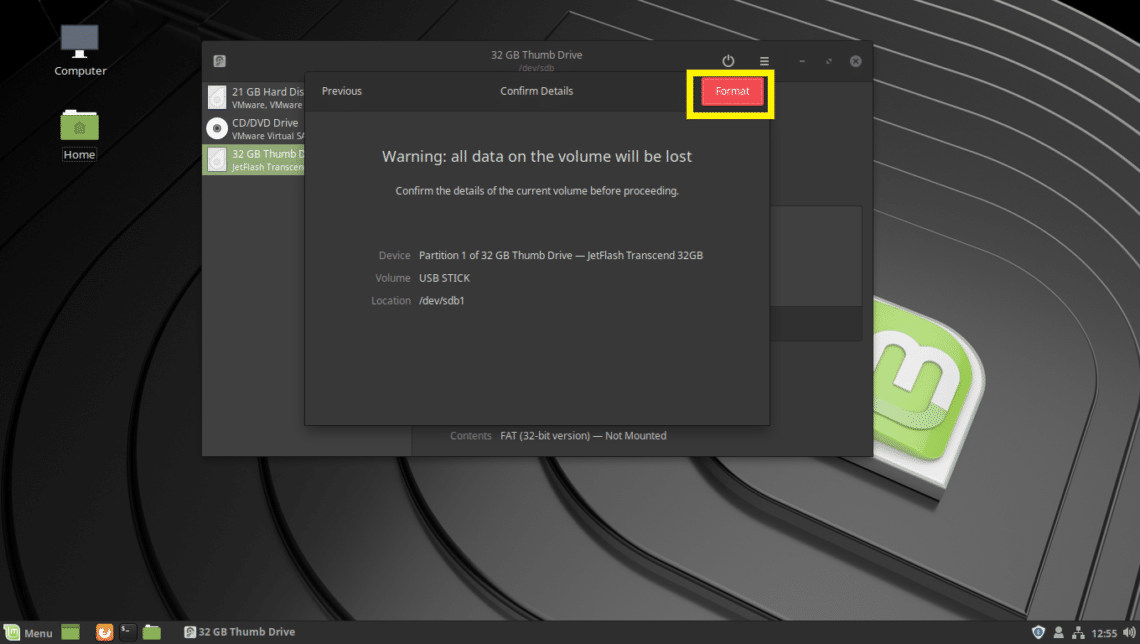
Now click on Format.

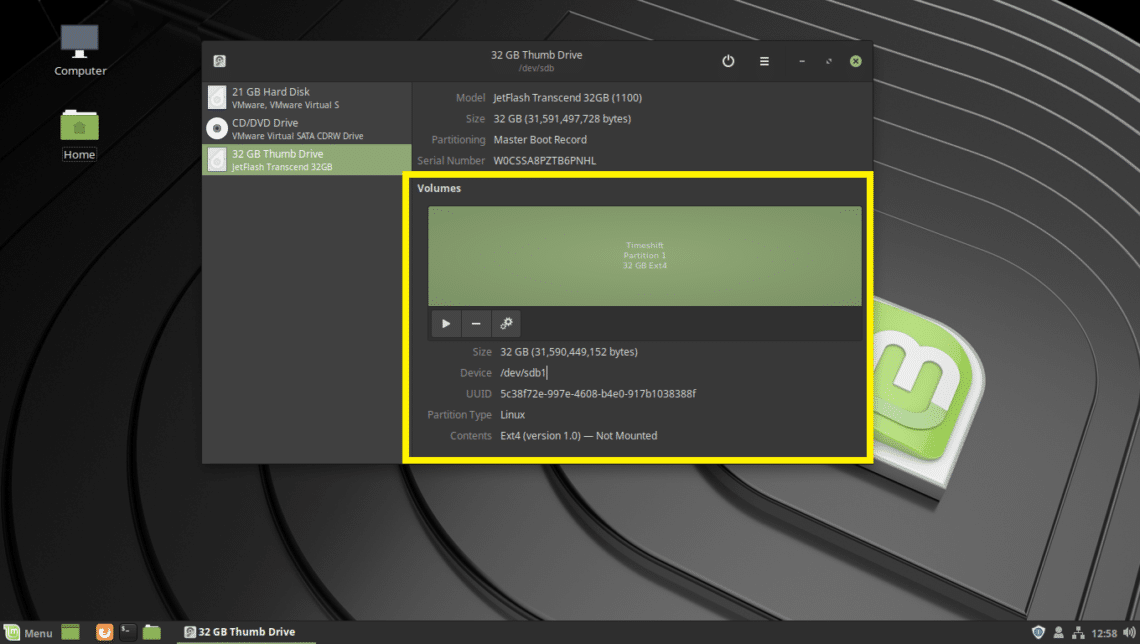
The USB thumb drive should be formatted.

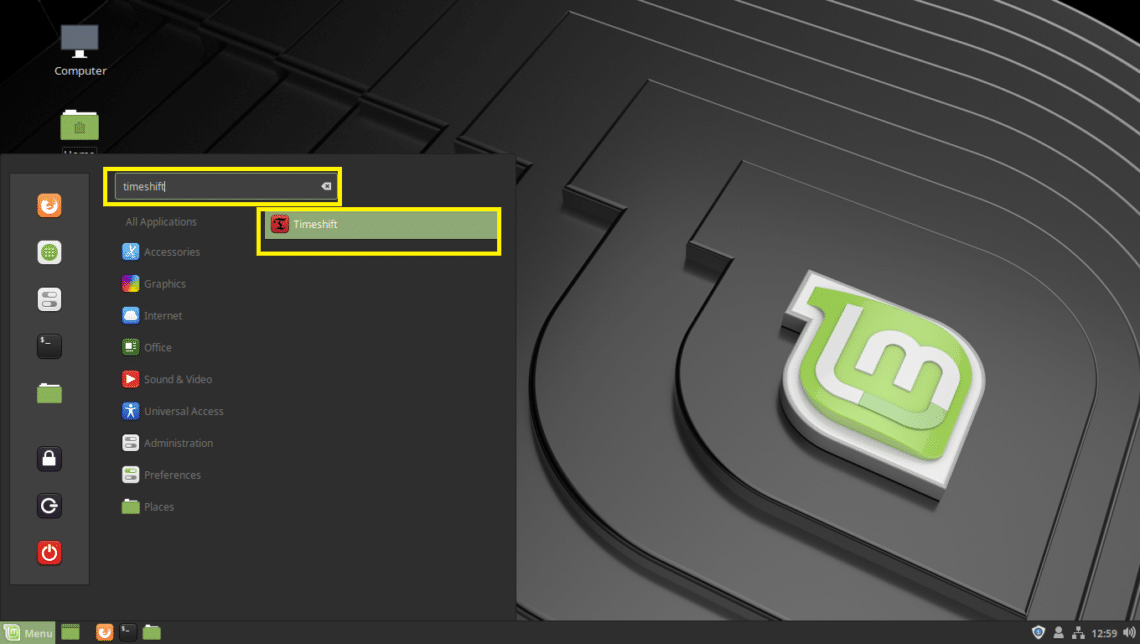
Now search for timeshift on the Mint Menu and click on Timeshift as marked in the screenshot below.

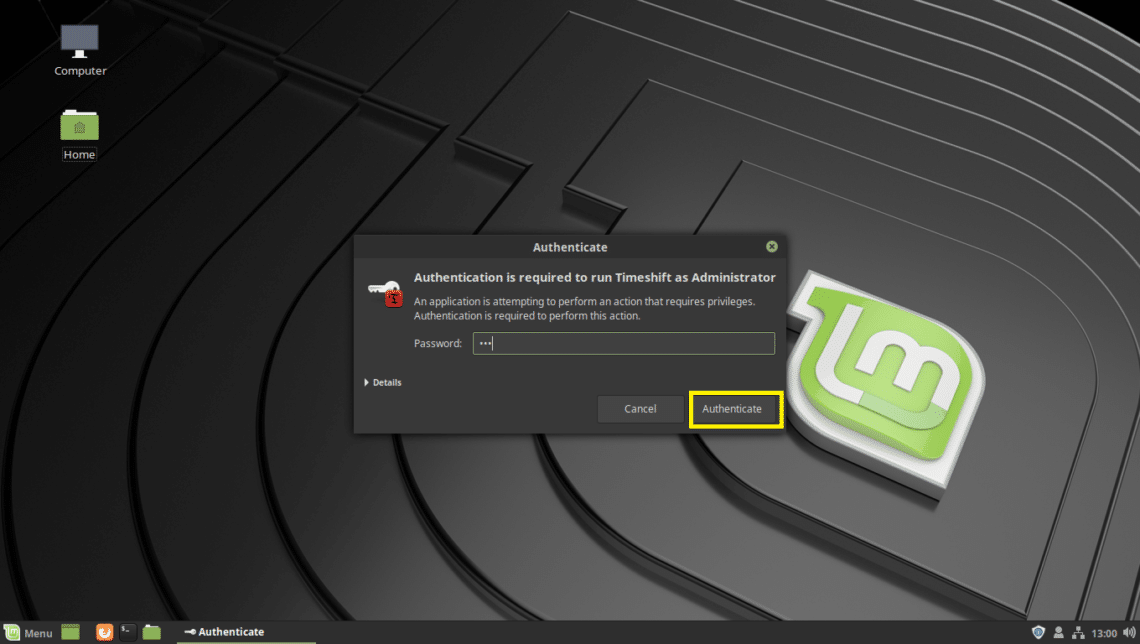
Type in your login user’s password and click on Authenticate.

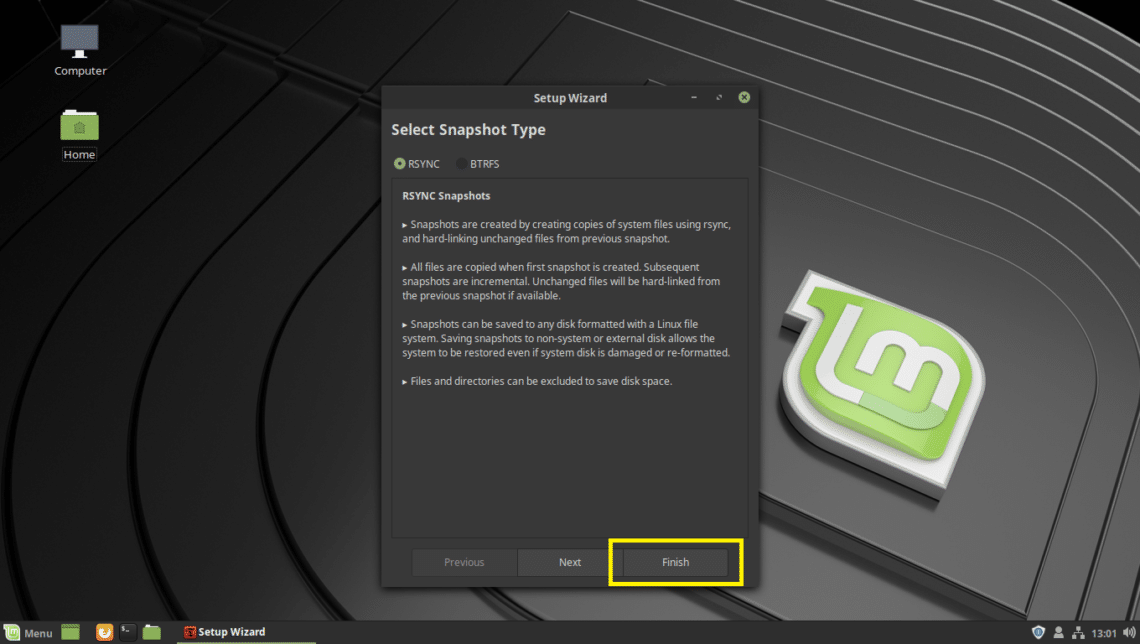
If you’re running Timeshift for the first time, you should see the following Window. You can configure Timeshift from here, but I am going to show you how to do that from the Timeshift app, as that way you can learn how to change configuration when you want to. So just click on Finish.

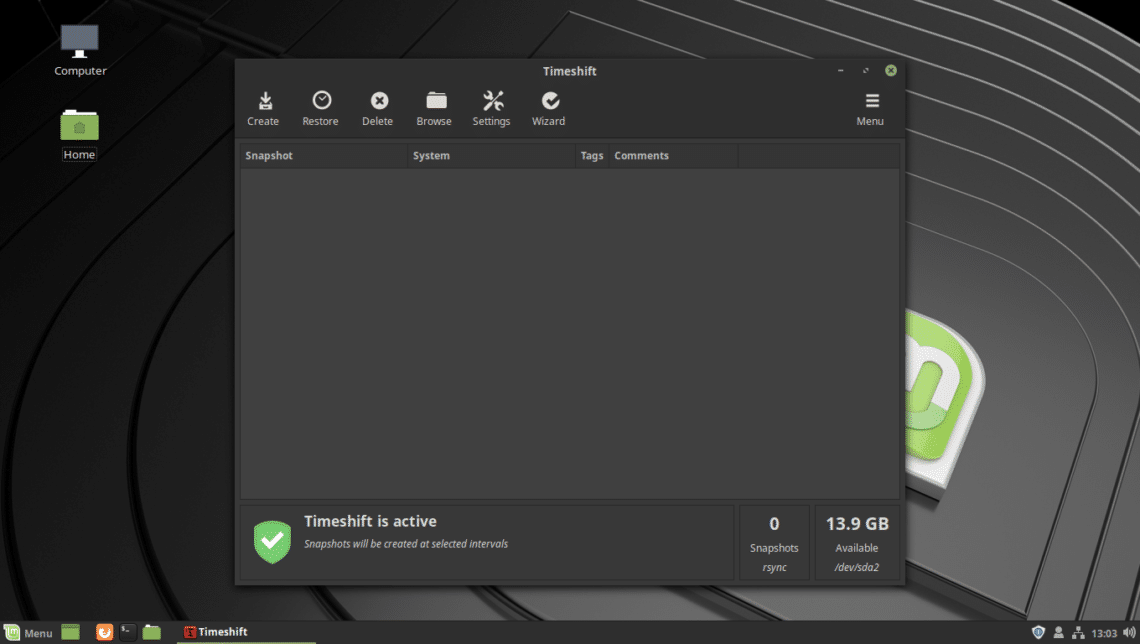
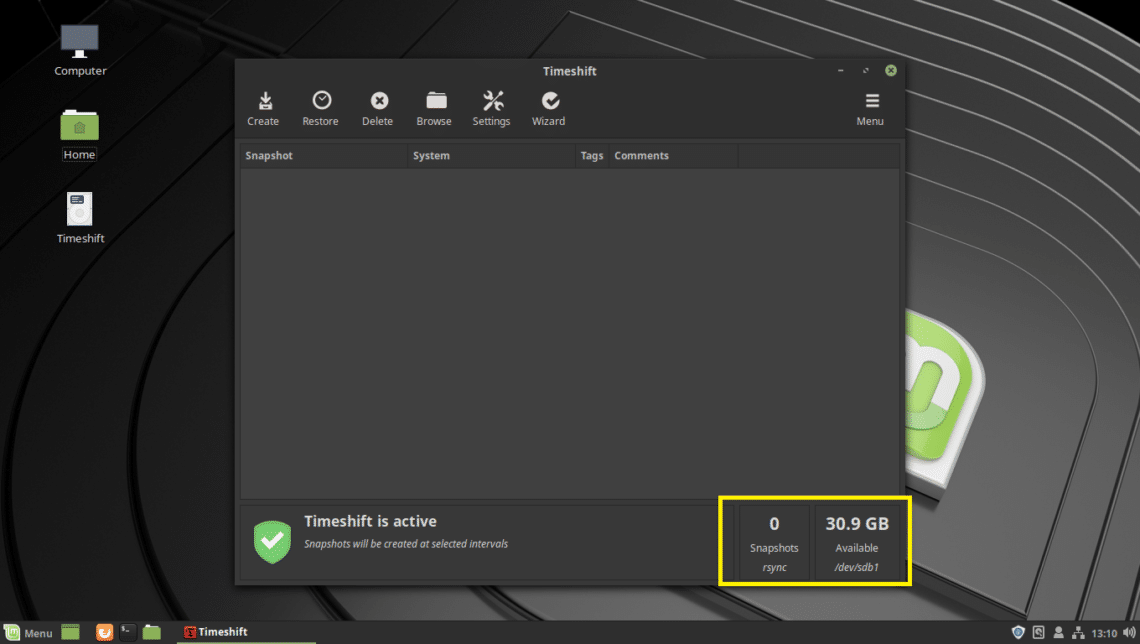
This is the main window of Timeshift.

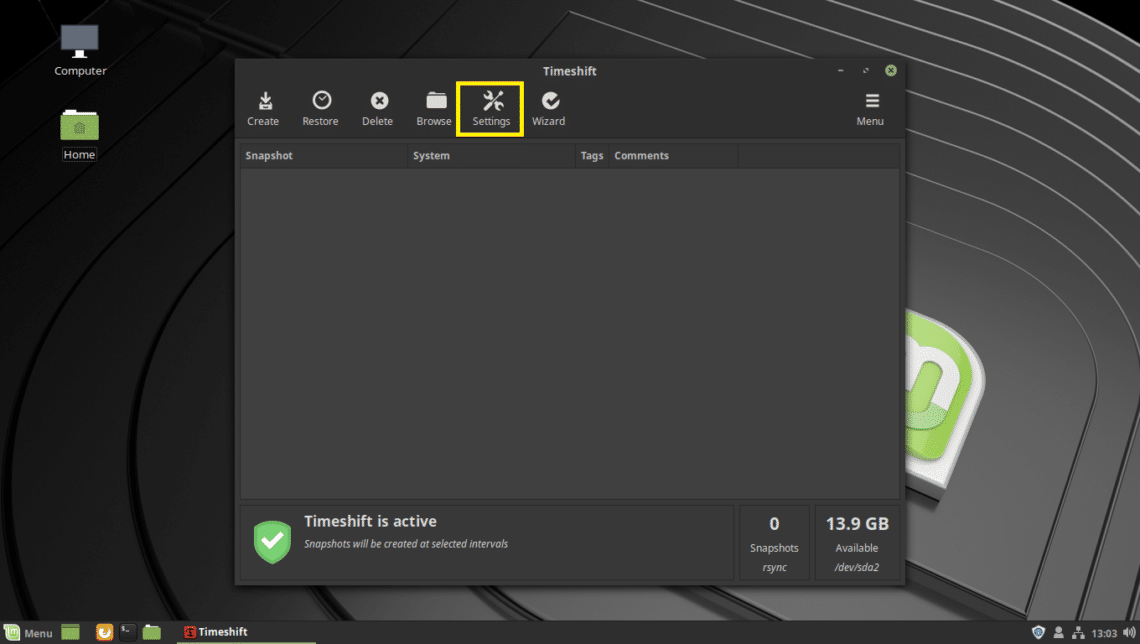
To configure Timeshift, click on the Settings icon.

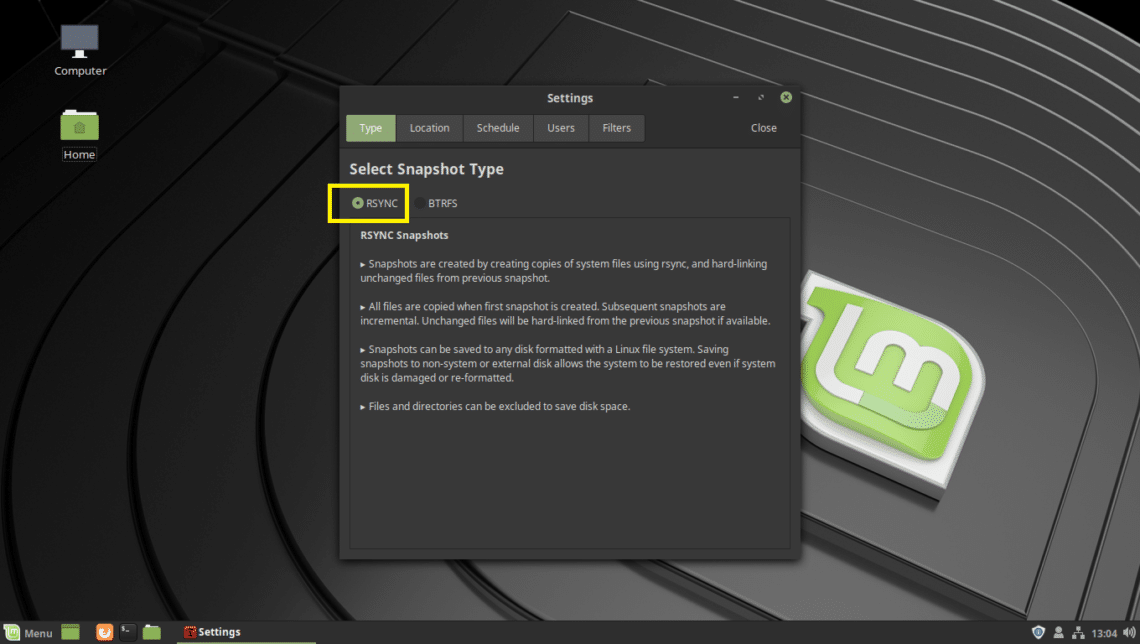
On the Type tab, select RSYNC. Now click on the Location tab.

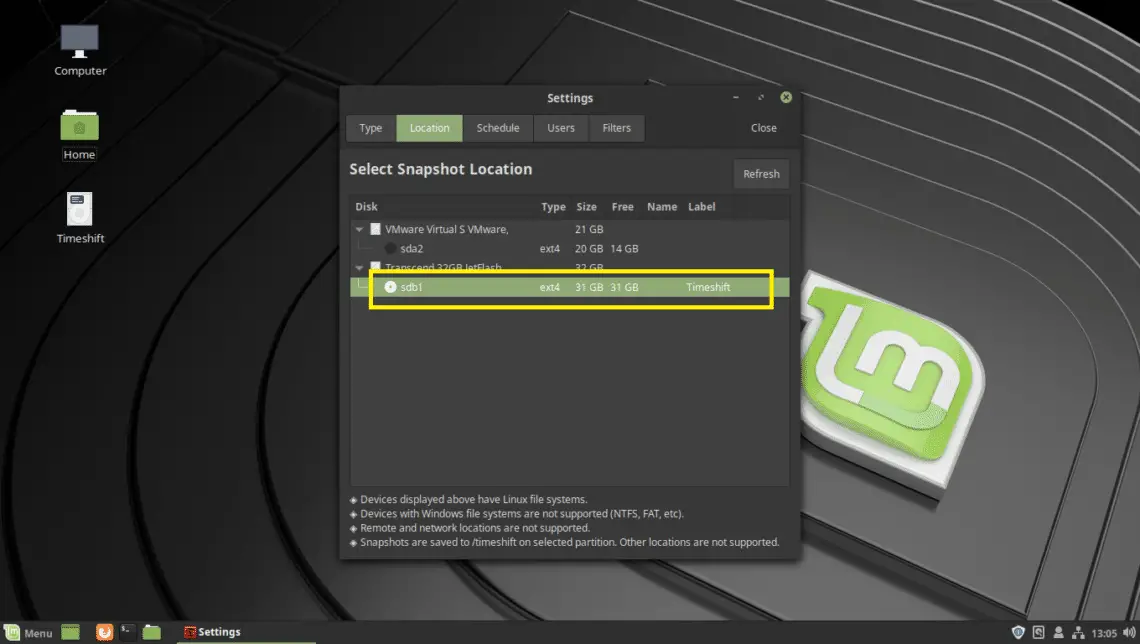
From your Location tab, click on your USB thumb drive.

From the Schedule tab, you can configure how often a snapshot is to be taken. You can uncheck all of the Snapshot Levels to disable auto snapshots. That way you can take snapshots only when you want.

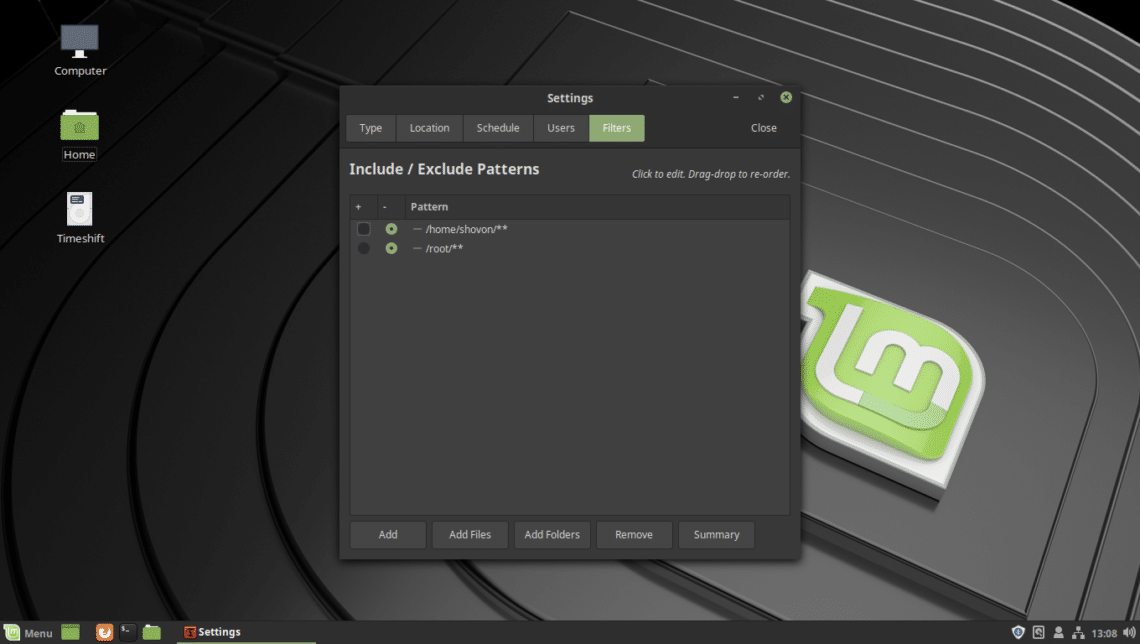
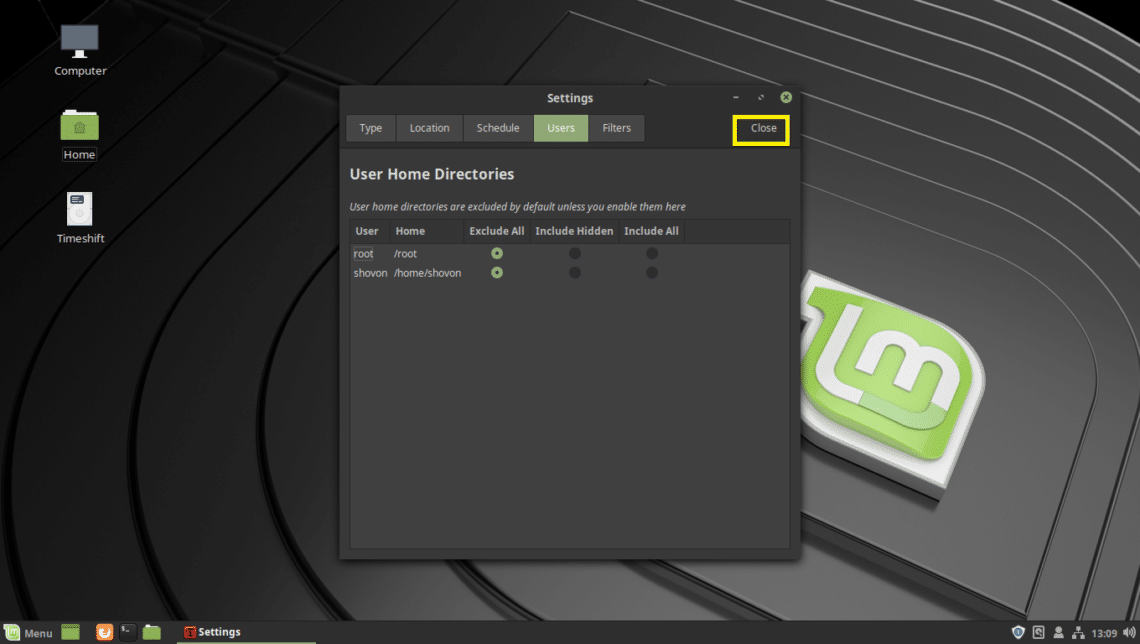
From the Filters tab, you can add directories. You can then include or exclude those directories from the Users tab. The excluded directories won’t be backed up when a snapshot is taken. So lost files can’t be restored. By default, the user’s HOME directories are excluded from the snapshot.

Once you’re done, click on Close.

As you can see, your USB thumb drive is now selected.

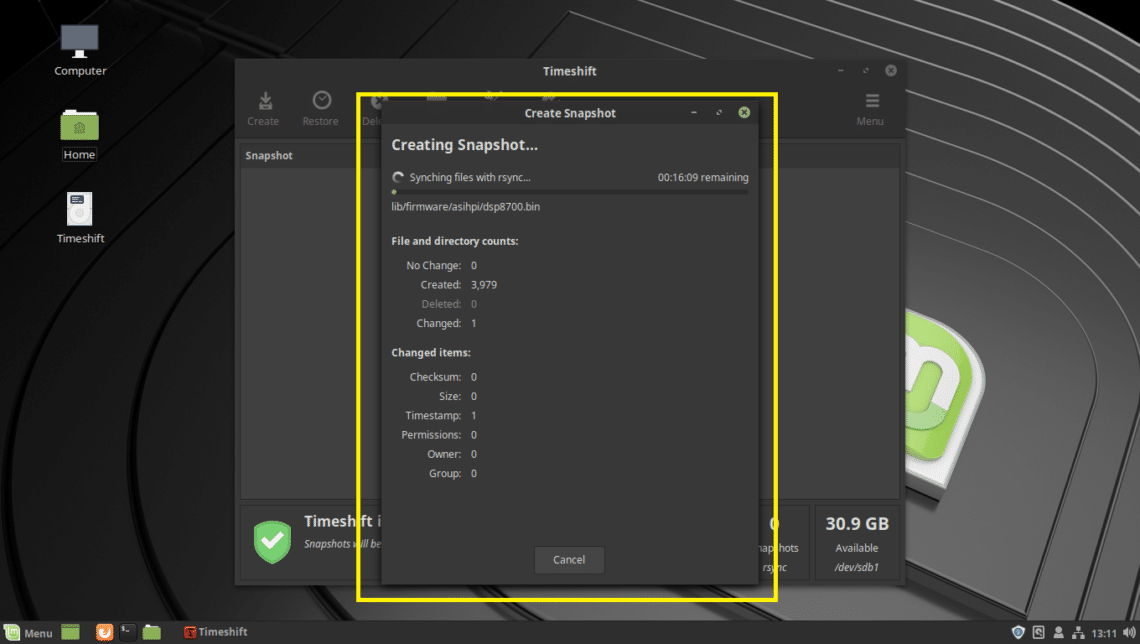
Now to create a snapshot of your Linux Mint 19 at this point, click on Create.

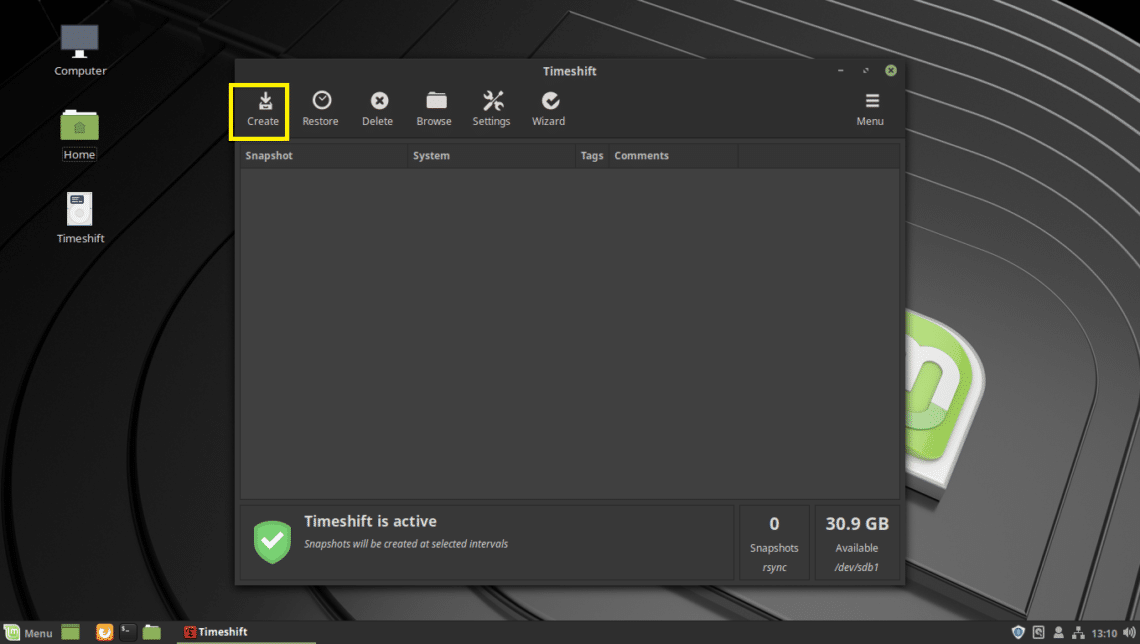
Timeshift should start creating snapshot. It takes quite a bit of time if it is the first Timeshift snapshot.

A snapshot should be taken.

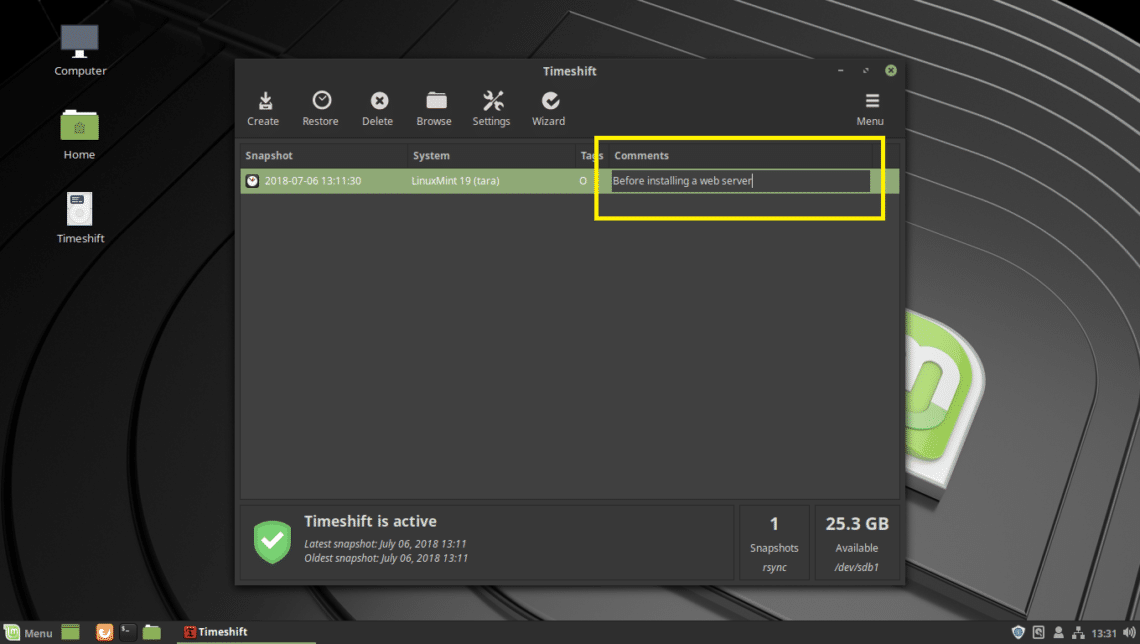
You can even add comments to your snapshot, so that you will be able to remember what it is later. Just click on the comments column of your snapshot and start typing. Once you’re done, press <Enter>.

The comment should be saved.

You can create as many snapshots as you want if you have enough space on your USB storage device.

Restoring from Snapshot using Timeshift:

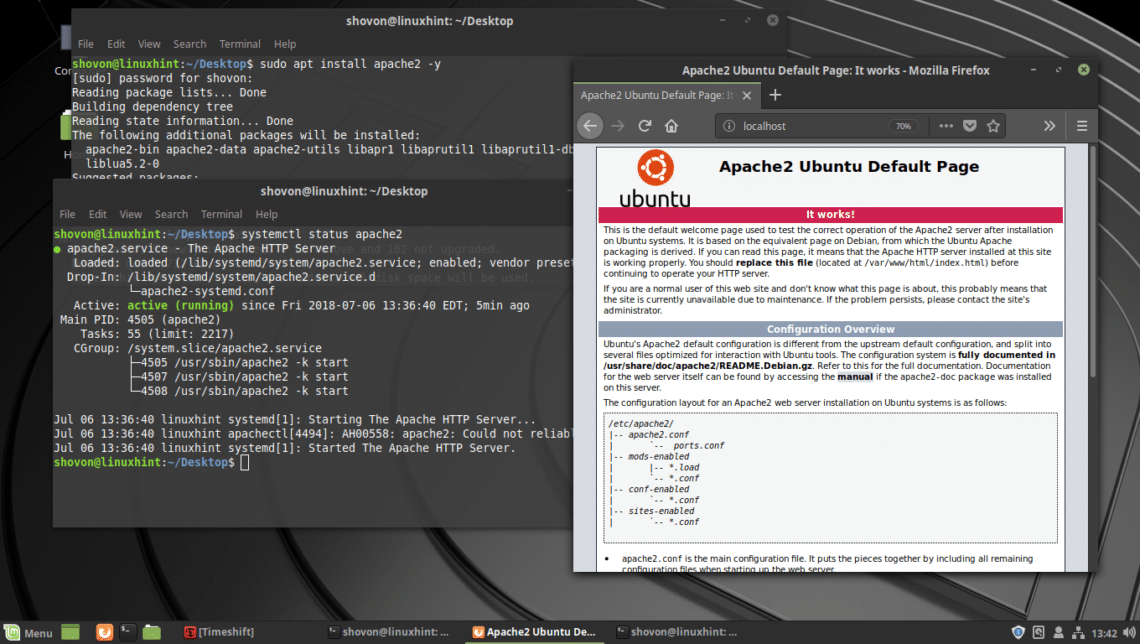
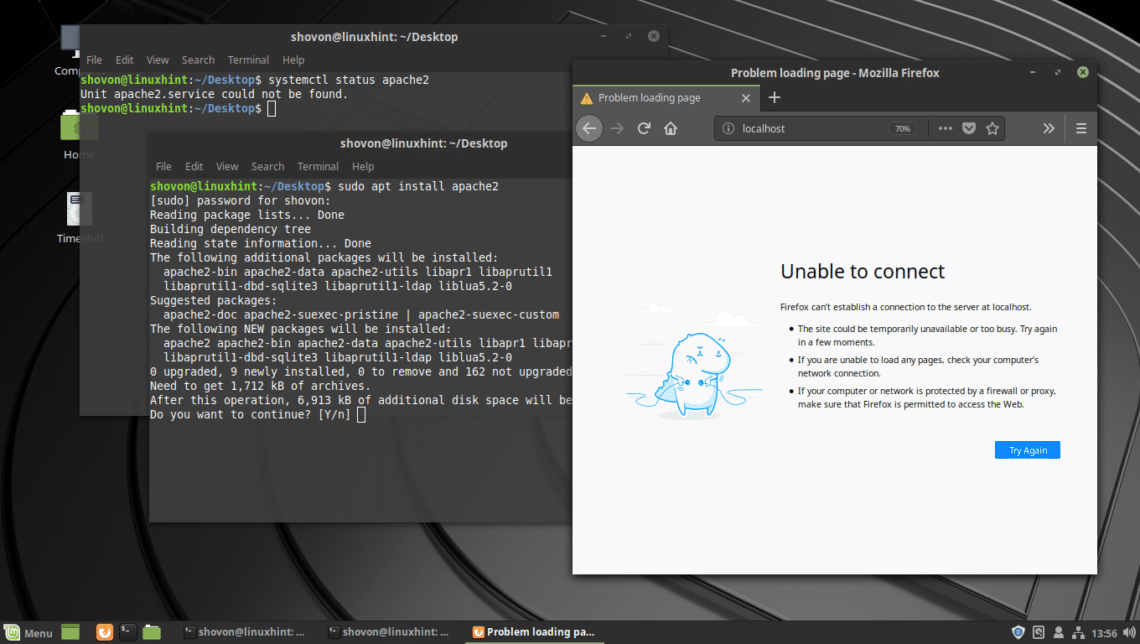
Now I am going to make some changes and then restore to this snapshot I created just now. I installed Apache 2 web server, with sudo apt install apache2 -y

As you can see, everything works. Now let’s just assume, it’s not working as you expected. Now you want to go back to the state before installing this web server.

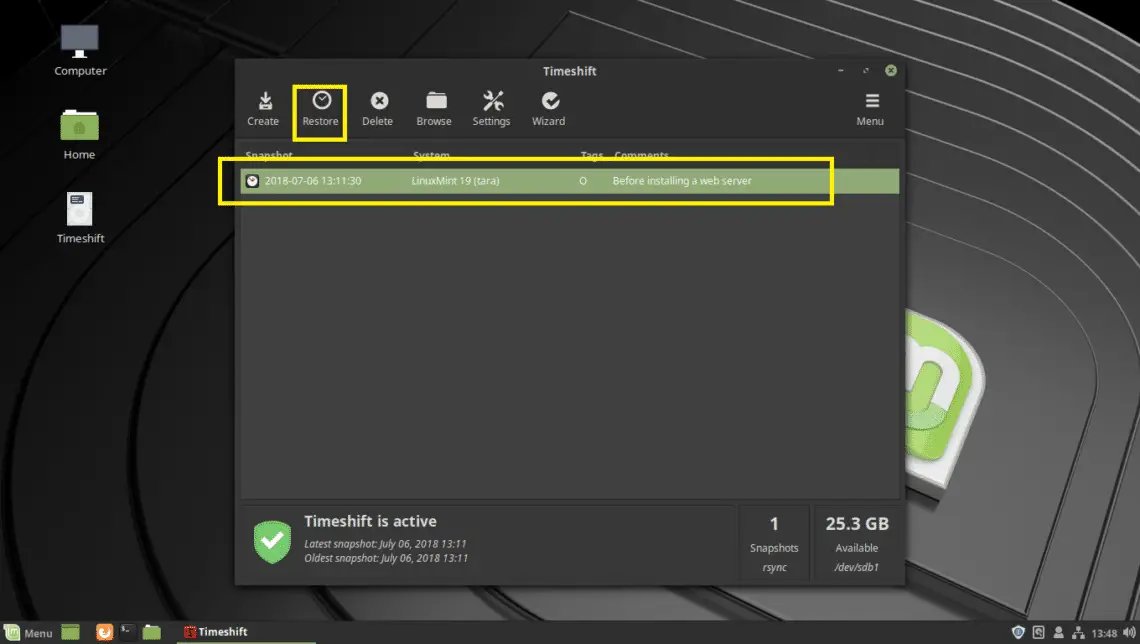
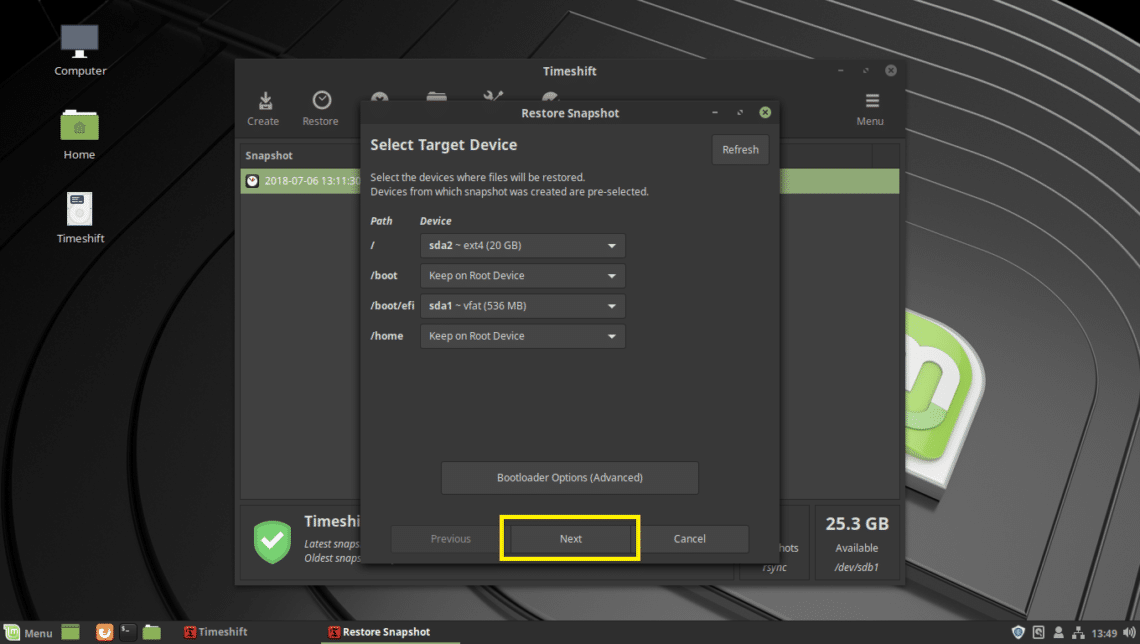
Just insert your USB storage device and open Timeshift app. Now select the snapshot you want to go back to and click on Restore.

Click on Next.

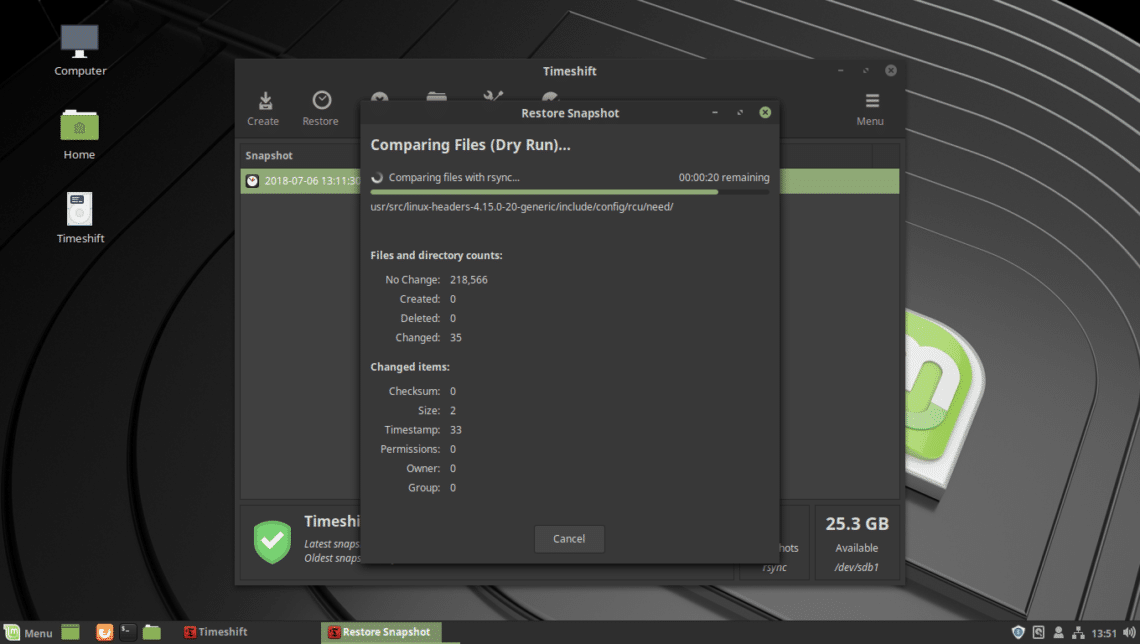
The restore process should start.

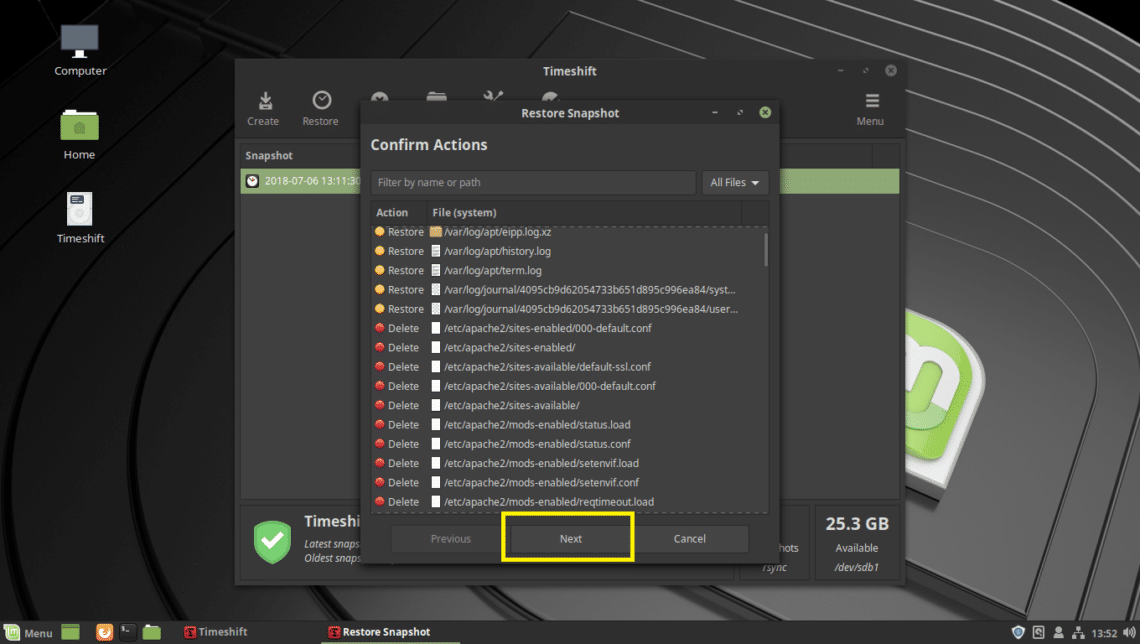
You should be asked to confirm it. Just click on Next.

Click on Next.

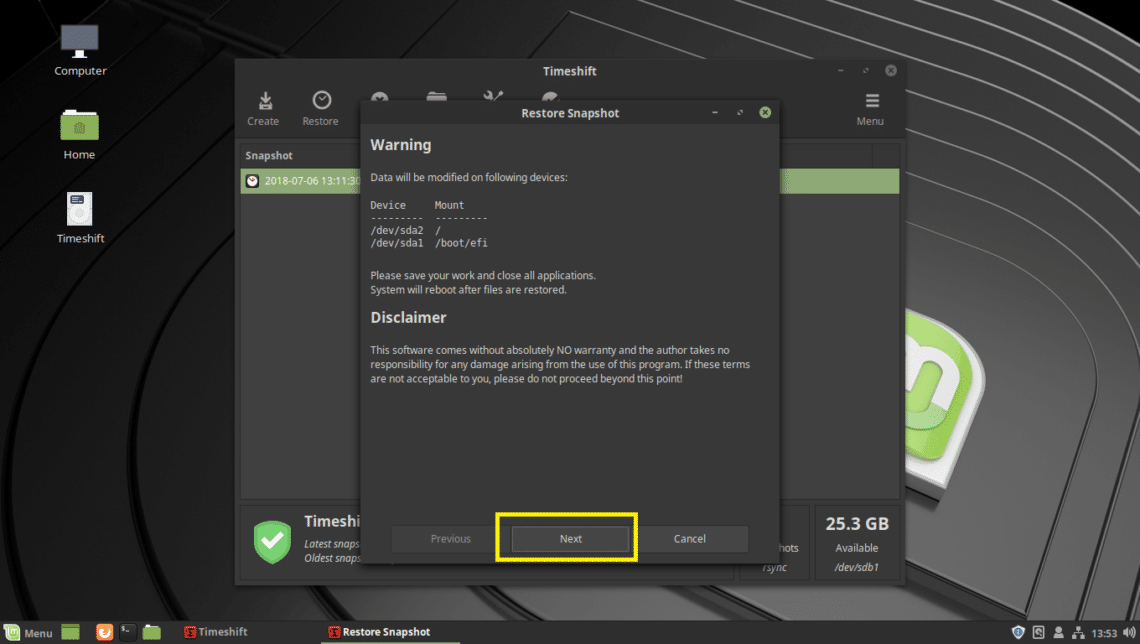
Timeshift should restore the files and reboot your computer.

Once your computer boots, you should not find any trace of Apache 2 web server as you can see from the screenshot below.

That’s how you use Timeshift to take backups and restore Linux Mint 19 systems from USB drive. Thanks for reading this article.

@source: https://linuxhint.com/timeshift_linux_mint_usb/